Sunday, August 26, 2012

A Look Back...

I have a few new projects that I've been working on to share with you, however, my husband went out of town this weekend and took both cameras with him, so I can't photograph my stuff :(

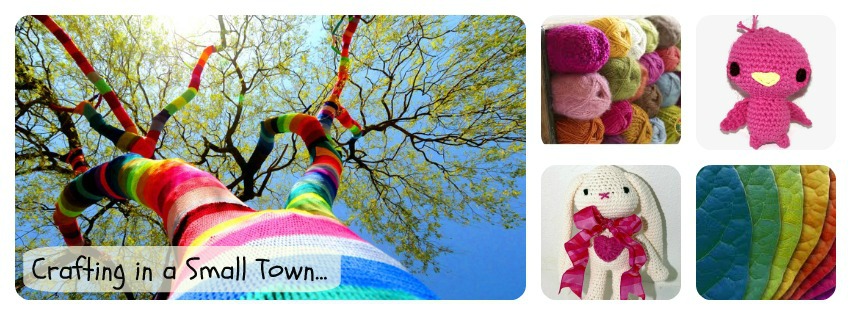
I was just poking around on Ravelry, and ventured onto my project page. I haven't added anything to it in awhile, but had fun reliving some of my past projects. I decided to share them with you. (Aren't you lucky!)

Before I took up crocheting about 3 years ago, I was exclusively a knitter. I got hooked on knitting when I starting watching Knitty Gritty on the DIY Network several years ago. I love Vickie Howell, and she made knitting look cool and fun.

I'm a very visual learner, and I basically learned how to knit by watching Knitty Gritty. I really miss that show :(

On one of the shows, they showed how to make a simple felted knit bag, which included an overlay design. I decided to give it a try, and here's what I made:


I really love how it came out. I never did put a liner in it, and it really could use one, so maybe one day, I'll get around to that (Ha!).

When I got more comfortable with my knitting skills, I decided I wanted to try cables. I decided for my first cable project, I would try using a bulky yarn, which seemed easier to learn on. I found this pattern on the Lion Brand website, and here is my finished scarf:

 
I still really love this scarf and use it every winter. It's so big and warm.
 
 
About 3 years ago or so, I decided to try learning crochet. My grandmother used to crochet a lot when I was a kid, and although she tried to teach me a few times, I never really was interested in it until after she passed away. I really wish she was around to see how I've adopted her love for knitting and crocheting. I think she'd be really happy. My grandmother made some beautiful things, and thankfully I have baby blankets that she made for both of my kids when they were born.
 
When I first started crocheting, I stuck to learning how to make simple squares. I made several blankets for family members, but decided I wanted to expand my horizons. Then I discovered amigurumi...
 
I LOVE making little crochet critters! If you look in my Etsy shop, you'll see some of the creations I've come up with since learning this wonderful artform. There are literally hundreds of free patterns to be found in the amigurumi world. One of my first original creations was my take on the Sock Monkey. This was the first one I made:
 
 
He sold some time ago, but he still holds a soft spot in my heart <3
I have made several monkeys since this first one, and I still enjoy making them in all sorts of different colors.
 
A couple years ago, a friend of mine was pregnant with a little girl, and I was invited to her baby shower. Hooray! I love crocheting for babies and children. I saw a cute crocheted doll pattern on the Lily Sugar and Cream website, but when I tried to follow the pattern, I wasn't completely pleased with how it was written. I was feeling more confident in my crocheting skills, so I took their basic pattern and changed it up a bit. And here's what I came up with:
 
 
Well, she was the hit of the baby shower! No one could believe that I had made her myself (I almost couldn't believe it either!) Needless to say, my friend was thrilled with the doll, and immediately put her on a shelf so she wouldn't get ruined. Unfortunately, I did not write down my pattern for this doll, so she may become one of a kind. I think I will need to come up with a basic doll pattern. I forgot how cute she was!
 
So, there you have it. A look into my knitting/crocheting past. There have been so many more since these, but these were my inspiration to continue to create.
 
~Lori~


Monday, August 20, 2012

That's Quite a Parking Job

I live in a small town which is connected to a larger, but still relatively small community. I moved to this community about 16 years ago from a large metropolitan area. When I first moved here, I noticed right away that people drove differently, and when I say "differently", I mean BADLY!

We unfortunately have a high number of traffic accidents around here, and many are fatal ones. You always have to be on the lookout while you drive.

Another problem people in my community have is parking. It usually looks something like this:


or this:


or this:


Ok, maybe not that bad, but you get the point.

As a regular visitor to Pinterest (and when I say "regular visitor", I mean "obsessed"), I like to get a good laugh in the Humor section.

I have seen several of these humorous Bad Parking Cards on the humor board.

For example:


or this one:


But my favorite one was this one:


I decided that I had to make some of these for myself.

I got on the computer and onto my trusty old friend, Paint Shop Pro 7, and got straight to work.

Here's what I created:


I immediately printed out a page full of these on white cardstock, cut them out, and placed them in my car. Now I'm fully prepared for the next time I come out of a store, only to find I have 2 inches of space to squeeze into my car. I can't wait! Bring it on bad parkers!!

~Lori~

P.S. -- Feel free to borrow my card and print some out for yourself!


Saturday, August 18, 2012

It's a Work in Progress Part 2

Sorry I've been ignoring my blog lately. It 's the end of summer vacation for my kids, and every day I hear, "What are we going to do today? I'm bored!" So, being the amazing mother that I am, I've been entertaining my children during the last few days of their freedom.

If you read my last post, you saw that I'm a bit ADD when it comes to my crochet. Well, the saga continues...


These are the newest projects that I have started and have yet to finish. I know...I have issues.

Let me break down my latest projects for you:


These two pieces of colorful goodness are going to be a fabulous pillow someday.

I had always wanted to try the log cabin pattern, so I thought a pillow would be a quick and easy way to try it out. I love the bright colors!


I wanted something a bit different for the back, so I went with a traditional granny square. I love the color combination so much in this granny square, I may have to revisit it someday in the form of a blanket. (That's all I need...another project to start)

Now that I have a few unfinished pillows that just need insides, I'm hoping to drag out the sewing machine this next week and get them finished!


I also started on a few of these lovely squares. They have a dream to some day become a blanket...


I'm hoping to make their dream come true some day!


As I was making the granny square for my pillow, I realized that I had never tried granny stripes. Well, that did it, I had to get started right away!

I'm making it in the colors of my daughter's room, so I'm hoping that some day it will grace the end of her bed. (She'll probably have changed the colors of her room by then.)


This next bit of gorgeousness is one I worked on earlier in the summer. Actually, I had made the hexagons several months ago. (What a surprise!) I came across a pattern from Lion Brand for a cute hexagon bag one day, and had an "Aha!" moment. I remembered my poor, neglected hexagons, sitting quietly in a closet, and told them that it was their time to shine!


The bag was really easy to put together, just a bit time consuming.
I'm thinking it needs some sort of liner, but that's for another day...

Now that your hand is probably tired from scrolling this page for so long, I'll sign off for now.
But don't get me wrong...there is more...
There is always more...

~Lori~


Wednesday, August 8, 2012

It's a Work in Progress

Ok, I'll admit it...

I'm not the type of person who can start one project and finish it before starting another one. I get distracted easily. I get inspired a lot. I'm impatient.

I always have several projects going at once, but I like it that way! I usually finish them eventually (ok, sometimes not). I admit that I do have a pile of unfinished projects stashed away.

It's the sign of a true artist! A bit scattered, but always creative. (I'll just keep telling myself that)

Anyway, I do have a few projects that I've been working on lately, and I've even finished some! Hooray for me! I'm close to finishing a few as well. I thought I'd share some of the things I've been working on recently.

The first couple are similar, just in different color schemes. I saw this pillow on this blog and had to make it!


Isn't it so cool?

She even has a tutorial posted on her blog to show you how to make it.

Well, since I'm a self confessed yarn hoarder, I knew I already had enough colors to make this without having to purchase any additional yarn. (I was pretty much right). I used Lily's Sugar and Cream cotton yarn and an H hook.

This was a great project to do while watching the Olympics!

So, here is the completed top of my version...


...and here is the completed bottom...


Now all I need to do is make a pillow insert and then crochet the pieces together. I'm hoping to get that done today.

As I started making this pillow, I thought it would be cool to make one to go in my daughter's room. I wanted it to coordinate with the "Hello" pillow I made for her. So I started a second pillow in colors to match her room (Yes, my inspiration got the best of me, and I couldn't wait to start it before finishing the first one).

So, now I have also completed the top of the second pillow...


Nice, yes?
And I've almost completed the bottom of the second one as well...


Only a couple more rounds and this puppy will be done!

But, of course, it wasn't enough that I had these two projects going. I needed some instant gratification! I'm impatient, remember?

So, I pulled out an old pattern the other night that I had made before and whipped out this little gem in just a couple hours...

Starfish Dishcloth


I found the free pattern for this dishcloth here...


It's a quick and easy project, and I even learned how to do a reverse single crochet! I had to go to You Tube for that.

Well, if you're thinking that's all I've been working on, you'd be wrong. I told you I was a bit scattered!

Tune in next time to see what else I've been working on this summer!
Until then, I think I'll go back to Pinterest for more inspiration! (like I need more projects)

~Lori~

Saturday, August 4, 2012

Swim the Fly

So, I think my kids and I are going to go see the new Diary of a Whimpy Kid movie this afternoon. We've enjoyed the first two, and the preview for the new one looks just as funny.

I recently read a book this summer that reminded me of the Whimpy Kid crowd. It's called "Swim the Fly".


The description for "Swim the Fly" reads as follows:

"Fifteen-year-old Matt Gratton and his two best friends, Coop and Sean, always set themselves a summertime goal. This year's? To see a real-live naked girl for the first time — quite a challenge, given that none of the guys has the nerve to even ask a girl out on a date. But catching a girl in the buff starts to look easy compared to Matt's other summertime aspiration: to swim the 100-yard butterfly (the hardest stroke known to God or man) as a way to impress Kelly West, the sizzling new star of the swim team. In the spirit of Hollywood’s blockbuster comedies, screenwriter-turned-YA-novelist Don Calame unleashes a true ode to the adolescent male: characters who are side-splittingly funny, sometimes crude, yet always full of heart."

I'm not sure if it's considered a Young Adult book, but I wouldn't recommend it for children under the age of about 14. The boys in the book are 15, after all, and talk like 15 year old boys. Plus, their goal for the summer is to see a live naked girl. Maybe not appropriate for your 12 year old to read.

Anyway, I found the book to be hilarious and laughed out loud several times. It's a quick read at about 350 pages. I read it on my Kindle Fire, so I got it for the low price of $2.99!

I'm reading the follow up now. It's called "Beat the Band". It's another enjoyable adventure with the boys. I'll let you know how I liked it when I'm done.

If you're looking for a quick summer read, "Swim the Fly" is a great one!

~Lori~


Thursday, August 2, 2012

"Hello" Pillow Tutorial


Well, here it is! Just as I promised. I will now give you a step-by-step tutorial on how I made the "Hello" pillow. Are you ready? Ok, here we go:

In this technique, we will be printing the "hello" graphic right onto the fabric using our computer printer. This is an easy and fabulous technique, however, you need to keep in mind that you are limited on the size of your pillow to 8.5" x 11" at the largest (unless you have one of those printers that can print larger).

First, we will prepare the fabric for printing:

Cut a piece of fabric slightly larger than 8.5" x 11"
(my piece was large enough to make two pieces to print)
I used a cotton muslin fabric.

Iron the fabric to remove the wrinkles.
(Please excuse the horridly ugly towel I used in this tutorial.
You will see in a minute why I chose to use it.)


We will now prepare the fabric to go through the printer.
We will be temporarily adhering a piece of cardstock to the fabric.
You will need some kind of a spray adhesive. I chose the Elmer's Multi Purpose Spray Adhesive.

Before you spray the adhesive onto the fabric, be sure you have something covering up the space around the fabric, or you will get the adhesive on it. (Thus the ugly towel in the pictures)

Follow the instructions on the back of the adhesive for a "temporary" stick.
For the adhesive I used, I sprayed the entire fabric with a light coat, holding the can about 4-6 inches away from the fabric. I then let the adhesive set for about 3 minutes before starting the next step. If you don't let the adhesive set for a few minutes first, the cardstock will stick too much.


Once the adhesive has set for a few minutes, place the cardstock onto the fabric and press it down firmly so that it sticks to the fabric. Again, I was making two pillows while I was doing this tutorial, so that's why there are two pieces of cardstock on my fabric. You only need one for this pillow.


Next, cut right along the edge of the cardstock along all four sides.


Once the fabric is cut to size, it is now ready for printing.


Place the fabric/cardstock combo into your printer with the fabric facing in whichever direction is required for your printer. For my printer, the fabric is facing upwards.


Pull up your graphic into your graphics program on your computer. I use the good ol' reliable Paint Shop Pro 7. I know it's a bit outdated, but I still haven't figured out the ins and outs of Photoshop, so I stick with what I know. Be sure to size your graphic according to the size of the paper as well. Remember later you will be sewing, and you need to leave at least a 1/4"-1/2" seam allowance around the edges. You may want to do a test print with a plain piece of paper to check the color and size of the graphic. You don't want to have to start over!


When you are ready to print, simply print the graphic as you normally would with your printer.
Hello gorgeous!


Now that you have the graphic printed onto the fabric, you can remove the cardstock. Simply peel the fabric from the cardstock. It should peel off very easily. (That's why you want to let the adhesive set for a few minutes before you put the cardstock on the fabric)


Ok, so we have the graphic printed onto the fabric, but we want to make sure it stays on the fabric. We will now put a sealer over the graphic. You can skip this step if you'd like, but I can't guarantee the longevity of the graphic on the fabric. I haven't tested the color fastness on this technique. If the pillow ever needs to be spot cleaned, I'd feel better knowing there is a sealer on the graphic.

For my sealer I used good ol' Modge Podge with a matte finish. You can use something else if you prefer. I know there are acrylic spray sealers out on the market as well.
 I may try one of those on a future pillow.


Apply a light coat of sealer onto the fabric until it is completely covered.


Let the sealer dry completely before going onto the next step. This picture shows the sealer on the fabric before it is dry, thus the foggy looking graphic. When the sealer dries, it will look clear. The Modge Podge does leave the fabric with a stiffer feel to it as well.


We will now prepare the fabric for sewing. I like to back my fabric with a cotton batting. It gives it more support so the stuffing doesn't make the pillow look bumpy later. I like to use Warm and Natural cotton batting, but any batting will do.

Place the "hello" fabric onto a double layer of the batting and cut around the perimeter.
You should have 2 pieces of batting.


Next, choose a coordinating fabric for the back of the pillow. You can use the same cotton muslin as the front, but my daughter liked this fabric and wanted it for the back of her pillow.


Take one of the pieces of cotton batting that you cut out and place it on the wrong side of the fabric. Cut around the perimeter of the batting.

You should now have both sides of the pillow cut and each piece should have a piece of cotton batting on the back.


Next, place the right sides together. (The batting is still on the back of both pieces)


Pin around the edges and be sure to leave an opening at the bottom for the stuffing.


Sew a 1/4"-1/2" seam around all four sides. (But don't forget to leave that opening!)

(Hey, nice table runner in the background, huh?)


Next, turn the pillow right side out. (Don't forget to remove the pins first!)


The pillow will look a bit wrinkly after you turn it right side out, but once you stuff it, most of the wrinkles dissappear.


Stuff the pillow with a stuffing of your choice. I just use a basic polyester filling. Stuff it to your personal preference.


We're almost done!


This is how I stitch the opening closed. If you have a better technique, please use it. I'm not much of a seamstress to be honest.


And, voila! We are done!


Hello!

The possibilities are endless with this technique. I made this graphic with my Paint Shop Pro 7, but there are so many sites where you can find free graphics. These make great accent pillows, and of course are a fantastic gift idea!

Oh, wait, before you go...

A little gift:


Now you can make your own "Hello" pillow!
Have fun!

~Lori~